Monday, 24 October 2011

How To Avoid Unnecessary Emails From Facebook

In this trick i will show you how to avoid unnecessary email from facebook.It is really bad that your mail inbox was flooded by spoofed emails by facebook. But there is no need of these emails because users can see these notification in there facebook account. They are more consistant visitors to facebook rather then email accounts.
Follow these steps to avoid emails from facebook.
  • Login to your account
  • Go to " Account setting"
  • Select the " Notification Tab "
  • Now in "All Notification " click on "edit" deselect all the selected option one by one
  • Save changes one by one
  • after this  within two days facebook will stop sendig mails to your email account.
This is how your "all notifications" screen look like after deselecting all the notification you are receiving. 

Download Windows 8 Transformation Pack


In this post I am introducing you with Windows 8 Transformation pack. You all knew that Windows 8 has not been created yet, even then DeviantART user Mufflerexoz has created a transformation pack for windows 8 upon their own Imagination.
There are alot of new features and there is a very new designed interface in the Windows 8 transformation pack. Though it looks very similar to the Windows  and Windows vista, there are many new changes like the new boot screen, explorer, taskbar, login screen and like that much more.
Here is the link where you can download the Windows 8 Transformation pack:
 
Enjoy and Comment must

Pendrive Uses as Ram


In this trick i will show you how to use pendrive as extra ram for your computer. Sometimes it is very disappointing that you are using an outdated computer system which has very low ram and that's why we cannot use application and games that want high ram. So what to do. There is a solution you can use your pen drive as ram.
Windows vista gives you the option to use pen drive as ram but this option is not available in windows Xp and windows 7. So what to do? A software can help you to use your pen drive as ram in xp and it is eboostr. This software will help you to use your pen drive as ram and enhance the speed your system.
To download this software go to www.eboostr.com
 
Enjoy and comment must

Learn How to Find Who is Online on Facebook while you are Offline

After many request I found new trick for Facebook. How to Check who is online on facebook while you are offline on Facebook account.

1)  First you will go to the login the facebook after you can go the offline on facebook account chat.

2)  Go to  this application page.
3) After install this application you able to show, who is online on facebook while you are offline on facebook account.  


Now if you want to talk to someone you can send him/her messages knowing that he/she is online.
Keep reading and keep liking

Learn How To Make Bootable Pendrive For Windows 7 Using Only Command Prompt

In this post i will show you how to make bootable pendrive for windows 7 using only command prompt.This trick is really great and you were really enjoy it. I got the basic commands from the net and am going to take you step by step through the process without having to use a 3rd party program using the command prompt to utilize DiskPart which is built into Windows 7 by default. So here I give a brief and 100% tested tutorial on how to create a Windows 7 Bootable USB Pendrive to install Windows 7 from USB Pendrive.

Also we can bootable pendrive on windows 7,VISTA,XP using software visit this Link

How to make bootable pendrive using command prompt and to Know how that works follow thiese steps.

1)  Open a command prompt as administrator (Right click on Start > All Programs > Accessories > Command Prompt and select “Run as administrator”.

2) Then run diskpart utility from command prompt, by typing ‘diskpart’ on command prompt and pressing enter. This will run the diskpart utility in the separate windows, which was shown in second picture below:
 3) Now type in cmd  "list disk" and hit enter .The number of your USB drive will listed. You’ll need this for the next step.Then you have to type ‘select disk2′ and press enter. Note: in our case it is disk 2, in your case it may be disk 3, or disk 1 or any other number.
 4)Now you enter ‘detail disk’ to see the details of the disk after selecting it to verify that you have selected the correct disk. You can see these steps in the image below:
 5) Then you have perform this command in cmd. The commands can run by order:
- clean
- create partition primary
- select partition 1
- active
- format fs=fat32  (Command "Format fs=ntfs quick" will speed up the format otherwise it takes hell lot of time to format big pendrives.)
 6) These steps are shown in the image below:
After the format is complete you have to run ‘assign’ command. And after this you can exit diskpart utility by entering the ‘exit’ command. The steps are shown below:
- assign
- exit.
7) After the format process is complete, put in your  Windows 7 DVD in your DVD drive, or if you have using any  .iso image of the DVD, mount that image using any virtual drive software like Power ISO.
Download UltraISO Software

- Now go to My Computer, & open the virtual or original of DVD Drive. Press ‘ctrl+a’ to select all contents
and copy all the contents by pressing ‘ctrl+c’.

-After complete all process. open the USB Drive and press ‘ctrl+v’ to paste all the contents of DVD into the USB Disk.

Enjoy Your Workings
Don't Forget to Comment

Sunday, 23 October 2011

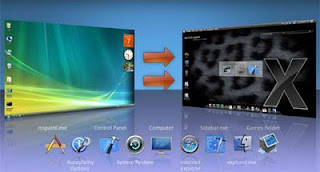
Transform window 7 to mac os X (THEME)


In this post i will show you the trick how turn your pc desktop look like mac.Many users wants there pc or laptop to look like mac because its look is very cool and interesting. To do this just download the file from the link given below and install it you are done .Now enjoy the experience of mac os X theme.Its a really cool trick definately

NOTE : Run the file as administrator. Right click on file and run as administrator.
NOTE : Password for the rar file is tricks4u

Download From Here

Activation Collection For Windows 7

Activation Collection for Windows 7 (02.10.2011) | 281.76 MB

 In this post you will learn Complete collection of ways to activate Windows 7 - a collection of programs and ways to activate Windows 7 by DG Win & Soft. This is great method to activate your windows i personally applied this method and this method is really work and my suggestion is to try this must.All methods and programs are checked personally by the authors build a lot of time and they can safely recommend them to you. All methods of activation in the hand being tested after the "anti-piracy" KB971033 update and activate SP1.

Download link :


Really Beneficial Post....
Try must and comment must
Thanks....

Thursday, 20 October 2011

Windows 8 (Metro x64)


   Windows 8 metro (x64) | 3.4 GB
      INCLUDE:
     zip 9.20
     Gimp 2.6.1
     java v 6.0.240
     RocketDock 1.3.5
     Rainmeter
     Internet Explorer 9
     Notepad2 v4.2.25-rc5
     Notepad++ V5.8.7
     Microsoft Silerlight V4.0.60129.0
     Adobe Flash Player 10 ActiveX
     Adobe Flash Player 10 plugin
     Adobe shockwave Player 11.5
     Microsoft Visual C++
     Taskbar user pic
     Microsoft .NET Framework 4 Extended 4.0.30319

Saturday, 8 October 2011

Save time on Firefox with GreaseMonkey

  Introduction to GreaseMonkey:
Sometimes when you use a web service, you thought wouldn’t be faster if the developer has added this button so that you don’t have to go thru all those navigations.
Like me, I find it very harsh by not having a delete button in my Gmail account. Everytime I need to delete an email, I need to go to the pull down menu and select “Move to Trash”.
Recently I have discovered GreaseMonkey extension. It allows users to use customize scripts, or even code on your own (if you know javascript) and able to add/improve feature on website – especially on web site usability and its navigations.
Instructions:
  1. Install GreaseMonkey Extension Updated: 2005/07/22
  2. After restarting firefox, come back to this page and right click on the script link below. You should able to see “Install User Script…” on the popup menu. Click that to install the script
  3. The script will then install into GreaseMonkey. By default, the script should be automatically included with one or more web pages.
Recommend scripts
For end user without programming experience, don’t worry. There are whole stack of scripts already available for you to just install.
Here’s my top recommendations:
  1. Gmail Smart-Delete Button Modification: Enable to add a “Delete” button on Gmail interface! (more..) Updated: 2005/05/28
  2. Ta-Da List Enhancements: “This script will add your lists to the right hand side of the list page.” (more..) Updated: 2005/06/02
  3. CustomizeGoogle – enhance Google search results by adding links to other useful services.
  4. Webolodeon – keep you out of meaningless web surfing. (more..)
  5. Del.icio.us popularity: Sort listed entries by number of linkers! Very useful.
  6. Bloglines Sidebar Squeezer: If you have so many blogs in bloglines like me, you really want to see more sites on the sidebar. This script able to remove the extraneous header and squishes the text of the sidebar so you can see more feeds at once.
  7. Google Image Re-Linker: “It’s purpose is to make links in Google Image Search point directly to the image, instead of loading up a thumbnail in a frame.” (more..) Updated: 2005/05/28
  8. Hotmail Single Window: Remove the javascript wrapper around hotmail external links which spawn new windows.
  9. Del.icio.us Skinner: Able to beautify del.icio.us.
Link Resources for GreaseMonkey:
General and Scripts:
Development on GreaseMonkey:
Blogs and News on GreaseMonkey:
Thanks

Internet Speed Up Lite 4.3.0.1

With this software you can Speed up your router and DSL connection
"Are you feed up of waiting for web pages to load"
Then be Proffessional and configure up your computer and internet connection by just installing a software
       Download Free

use your connection at its maximum output

Free Interet Speed Up Lite offers you all these capabilities and more, just follow the instructions to tailor your own speed internet connections.

Fasten your internet speed
Secure out your connection
Speed up your Cable,Dsl and modems
Add three more speeds greater than 115200 to your modem settings
Advanced crash recovery

Dowload it by clicking
http://internet-speed-up.en.softonic.com/

All rights are reserverd to its respective owner and developers.I am just presenting its review...
Thanks

How to access the restricted or banned websites?


In this i will teach you how to access prohibitted and restricted websites.Isn't it great you will be able to access those websites which are banned and restricted.You can access the restricted or banned websites with the help of this tip. You may have problems to accessing your favorite's politics, news, and sexy websites in your office and other public places. Some time these websites banned by Government, ISP and may be by your office network administrator. This tip is very useful, if you are using internet particularly in school, college and office. 

Follow the given points to access the banned website: 

Technique 1: Search the banned website, for example www.Facebook.com in Google and yahoo search engine then open the cached copy of that page to access the website. You can get also cache link of that website, if you search in Google with keyword cache:URL name and get cache link to access the website.
Technique 2: Another method to access the banned website using its IP address, because you can open the website with IP address instead of actual URL name. This technique bypasses the URL based restrictions. For example if www.myspace.com is banned in your school, you can open it using IP address 216.178.32.51. You can search online IP conversion tools to get IP address of any website. 

Technique 3
: There are some mini web browsers can help you to open the banned websites, for example
Opera Mini Browser, install it and try to open any banned website. Another Real Player browser can successfully help you to access the banned website. This Real Player browser bypasses the many restrictions of website banned tools.
Technique 4: There any many websites Anonymiser tools are available to fetch the banned website. These anonymous surfing tools that protect your identity on the internet and give the access to banned sites. As far as the service provider is concerned you are viewing a page from Anonymiser and not the blocked site. 
These tips are very useful to access the banned websites in your university, cybercaf,office and other public places.
Thanks..

How to improve your Wireless internet and network connection?

In this trick i will show you how to improve your Wireless internet and network connect.Microsoft Windows gives you a notification whenever your wireless network has a weak signal This is a sign that you should improve your wireless network.When you get this notification, it means that the wireless connection is not as reliable or high-speed as it's supposed to be. In fact, the wireless connection signal may be completely lost in certain areas of the house.If you would like to improve your wireless network signal, you should carry out a few of these tips. These tips will extend the wireless range.They will also improve the overall performance as well as reliability of the wireless network

Re-position the wireless router (or wireless access point) to the center of the house.

Place the router away from walls.
Place the router off the floor.  
Place the router away from metal objects.
Instead of using a standard antenna which you get with the router, use a hi-gain one. If the standard router is placed by an outer wall, part of the wireless signals will be directed outside the house. This will also waste the power of the router. Hi-gain antennas send the wireless signals in a single specific direction which you are able to aim on the path where you need them a large amount.
Replace your laptop or computer's wireless network adapter with a USB network adapter. It uses an external antenna that improves the range of the signals. (Laptops which have built-in wireless normally contain outstanding antennas. They do not usually require to be upgraded.)
Add a wireless repeater to extend the signal range.

Change the wireless router's channel to increase the strength of its signal. You can do that through the configuration page of the router. The computer will detect the new channel itself.
Reduce wireless interference by avoiding wireless electronics which use the 2.4GHz frequency. You should use cordless phones which use the 900MHz or 5.8GHz frequencies.
Update your firmware updates for your router through the manufacturer's website. Update your network adapter driver through the Windows Update feature of Windows 7 and Vista or visit the website www.update.Microsoft.com for Windows XP.
Upgrade 802.11b devices to 802.11g or buy a new 802.11 g equipment.  It is five times faster than an 802.11b device.

Thanks

How to Print the Whole Page

In this trick i wil teach you how to print the whole page of your desktop.If you are browsing any website and want to print it in readable form without any extra graphics. There is a option on many websites " Print " to print a page in text format only, otherwise you can print out any webpage with its background colors and with out background colors using Internet Explorer setting. Generally Internet Explorer setting  "Print background colors and images" is disable, if you are printing webpage without background colors, then you can speed up your printing and save printer ink. But important thing to always preview WebPages before you print, in Internet Explorer go to File menu, then click on Print Preview option.
To enable or disable print background colors option, open your system Internet Explorer.
Click the Tools menu and then go to Internet Options and open it. Here click the Advanced tab then scroll down to find the option Printing section.
Now check the option "Print background colors and images" then Apply and ok.

How to avoid fake Security Warnings or pop-out?


In this trick i will show you how to avoid fake security warnings.When you are browsing the internet and suddenly a window pop up with different messages for example" free update for your computer ","scan your computer with free antivirus". May be some pop-ups messages helpful for you but you should read first in detail before clicking it. Pop-ups basically an advertiser message or unwanted program and website that might be disturb your computer performance.
If you are working with Internet Explorer and want to block the pop-ups windows and unwanted messages.Open the Internet Explorer and click on Tools menu and go to Pop-up Blocker option, here you can Turn Off Pop-up Blocker to block pop-up from all websites.But you have option to allow some websites for pop-up. For this purpose open the Pop-up Blocker Setting.Here you can add some specific websites name to allow for pop-up and click Add. If you feel any problem to block any pop-up message due to some problem, simply click on the X at the right top of the pop-up windows.
Thanks

Searching Information tips using Search Engine

In this trick i will show you how to use searching information tips while using Search engine.If you want to get some information about any topic using search engine, the search engine will search the given information and will provide a list of links of websites along brief description about each website. You should use the right search terms for relevant results.
The following points must be noted to search the information on the internet.

You can type all word in lowercase and also in uppercase, search engine will return the same result.
But the best practice is type search keywords always in lowercase.

  • Use + sign between words if you want to search the all words. For example, to search history of Football in Europe, type as:
        history+Football+Europe
  • To search the exact match, write the words in double quotation marks. For example to search the map of Europe, then type as:
        "Map of Europe"
  •     Always avoid to use "and", "or" with search keywords, because these words will affect the search result.
     
    Thanks

Clear History and Temporary Internet Files

 
In this trick i will show you how to clear history and temporary files from your browser.When you are browsing the internet,the Internet browser cached some file on the system as temp files for later use. Specially if your are viewing some private but your web browser will store all your information (visited websites) as a history and your co-workers, family members can trace your activates on the internet with clicking of toolbar history button or with simply press Ctrl+H. If your are using internet at any public place like internet cafe then you should clear your temp file history to safe yourself from cyber crimes.

  • If your are using Internet Explorer and wants to delete the history, then first open your Internet Explorer.
  • Click on Tools Menu then go to Internet Options. Here in General tab you will find the Delete Cookies and Delete files tab in the center of the screen.
  • First click on Delete Cookies option to delete all the cookies in the temporary files folder and then click on Delete files option to delete all the offline temporary files.
  • Now click on the Clear History button to clear your recently visited sites. You can set days to keep pages in history here. Be default it is 20 days, but you can change it from 0 to 99 days. If you set it 1 days, the system will clear your browser history automatically after one day.
  • Click on Ok button to save your changes.
    Thanks...

Enjoy with Internet Explorer Shortcut keys and Safe Time

In this trick i will show you how use smart internet explorer shortcut keys to safe your time.Normally a computer user spending his maximum time daily with internet browsing different sites. But if you are familiar with internet explorer shortcuts keys, you can increase your browsing speed and can handle many online browsing restrictions very easily.
Here are some common internet explorer shortcut keys.
  • Press F5 to refreshes the webpage.
  • Press Backspace button back to the previous page.
  • Press Alt+Home button same time to go home page of the website.
  • Press any time Ctrl+N to open the new browser windows.
  • Press F11 key to view any webpage in full-screen view and then again press for normal view.
  • Press Ctrl+P keys to send the print command for current whole page.
  • Press Ctrl+H keys to view your browsing history.
  • Press Ctrl+w keys to close the current browser window.
  • Press Esc button to stop any page browsing.
  • Press Ctrl+Enter Windows will automatically add both "www" and ".com". For example, if we type
        computerfreetips 
        in an address bar and then press Ctrl-Enter, Windows will take us to the
Thanks...

How to quickly repair your Mobile Phone dropped in water?


In this trick i will teach you how to repair quickly your mobile phone if it is dropped into water.Many of you get your mobile phone wet by one way or another.You worry as you mistakenly drop your mobile phone in water. It can also get wet if you are out in a heavy rain.  However, there is no need to panic. It is possible to save your wet mobile phone by quickly repairing it. In order to save your mobile phone from water damage, you can consider these easy and simple solutions to get your mobile phone back

Act rapidly :


The first thing you have to do in order to save your wet mobile phone is to act rapidly. Quickly remove all the detachable parts as well as covers possible such as the back cover, battery, the SIM card, memory card etc. Next, take a piece of cloth or a tissue paper to wipe the excess water you are able to notice within the mobile phone. Make sure that you dry it completely. If you don' t do this, the water inside the mobile phone will begin to evaporate and gather in places which will be difficult to reach.
This will save your wet mobile phone and it will start working if it was under water for just a little while.

Using a hairdryer :

Take a hairdryer and begin drying the mobile phone while giving more consideration to the place where the battery is located. The battery housing usually consists of tiny holes to let in air (so giving more space for water) inside the mobile phone.
Make sure that you are not holding the hairdryer very near to the mobile phone. Keeping it too close to the mobile phone may harm the electrical mechanism of the mobile phone. Keep on drying the mobile phone from a safe distance for about twenty to thirty minutes.
If solution number 1 and solution number 2 don't work, try solution number 3. 

Drying for a long time:

Take off the covers as well as battery from the mobile phone. Put the phone in a dry as well as warm place to let the water inside the phone evaporate gradually from the little holes in the mobile phone


Thanks..

How to convert older Office documents to Office 2007 format?

In this trick you people lean that how to convert older office documents to Office 2007 format.The Office 2007 applications such as Word and Excel can open a spreadsheet or a document which is in an older edition of Office.  They can open such older version documents in Compatibility Mode. However,if you need to make use of various newer features available in Office 2007,you will have to convert older Office documents to Office 2007 format.The feature to covert older Office documents to Office 2007 format is very useful. For example, you can now utilize 1.1 million rows in the 2007 version of Excel. In the older versions you could only use sixty-five thousand rows.  The method to convert older Office documents to Office 2007 format is the same for all applications. Here we are using the example of a Word document of previous version.If you open a Word or Excel document of an older version, you see [Compatibility Mode] as part of the title.
Follow these steps to convert older Office documents to Office 2007 format:
Open the Word document which you want to convert into Word 2007 format.

Click on the Microsoft Office button on the top left side.
Click on Convert on the left hand side of the menu.

Click on the OK button on the Microsoft Word Office dialog box which appears.
By clicking on the OK button, the document will be automatically converted into the Word 2007 format. You will notice that now the window does not show [Compatibility Mode] as part of the title bar any longer.

How to change the boot Time in window XP?


In this post you will be able to set the boot time in windows XP according to your own wish if you are install two 

operating systems on same computer, for example window 2000 with windows XP or more than two. Yow can do 

this with editing Boot.ini file. Here you can also set  the sequence for operating system which operating system

boot first.
First Right Click on My Computer option and then select its Properties. In next dialog box open Advanced tab button. Under Startup and Recovery, click on the Settings button. Use the spin box "Time to display list of operating systems" to set the number of seconds you want the system to wait before automatically starting the default operating system. Here you will set time in seconds and its range start from 0 and ends with 999 seconds.
After set the time, then click OK option to close the dialog box to save your change. The next
time you restart, the new time will take effect
 
Thanks...

How to restore the windows XP to a previous working state?


Today's tip is very useful to recover the windows XP problems and then restore it in previous working state.
You can recover the windows critical components and return your computer to earlier state without loss of
personal data u
sing windows XP built-in system restore feature. With new programs being installed,
viruses infecting and spyware creates problem in your browsers it is not unusual for your computer to
suddenly stop behaving correctly. So you can perform the windows recovery process and return your
computer to earlier state within a minute
. 
Follow the given steps to run System Restore wizard:
To use this feature, you will need to be logged into your computer with administrative rights.
First click on Start button> All programs> Accessories> System Tools then click on System Restore.
 
 
Now a "Welcome to System Restore" wizard will start, first read the detail instruction on left side of the page.and then response it

How You Can ChangeThe Recycle Bin's Name?

In this trick you can change the name of Recycle Bin of your system if you wish.This trick is very easy and interesting but it require some changes in windows registry,  
  • First click on Start button > click on Run option.
  • Type here regedit.exe and press enter then you will find there regedit editor.
  • In regedit editor you will open HKEY_CLASSES_ROOT folder, In this folder open the CLSID folder then open the {645FF040-5081-101B-9F08-00AA002F954E} folder >ShellFolder folder at last.
  • Here simply change the data value from "40 01 00 20" to "70 01 00 20".
    After performing all above steps restart your computer then you will find option to rename Recycle name after right clicking on Recycle Bin Icon. 
  • Now you can change new name as you wish.

How to disable auto-start applications on windows startup?

In this you will be learn that how to disable auto start applications on windows start up.these applications might be cause of irritation of yours and also slower down the speed of your internet connection or pc also.Using this tip, you can minimize the startup time of windows XP and Vista also. You can disable some optional windows applications like windows messenger, Yahoo messenger, QuickTime and many others auto startup programs that run automatically when you start your computer.
Follow the given steps to disable the windows auto run applications: 
To use this feature, you will need to be logged into your computer with administrative rights.
Click Start button and type msconfig in Run option then press Enter for next.
A small System Configuration Utility dialog box will appear with many options like General, System.ini Win.ini, Boot.ini, Services, Startup and Tools.
Now select Startup tab and uncheck the applications that you want to disable from windows startup.
Now click on Apply button to implement the changes then click on Ok button to end the configuration process.
Again close the all program and restart your computer after any changes to go into effect.
Thanks and comments are welcomed.

How to login with multiple ID's at the same time in Yahoo messenger?

In this trick you will learn that how to login multiple ids at the same time.If you have multiple yahoo ID's and wants to login with more than one yahoo ID at the same time then don't worry, you can login with more than one yahoo ID at the same time using this trick.There is no need to install any other yahoo multi messenger version, you can easily covert your normal yahoo messenger into multi messenger and enjoy your many ID's at the same time.  
Follow the given steps to change the yahoo messenger registry value:
  • Click Start button and type regedit in Run option then press Enter for next.
  • Here locate the location to:
  • HKEY_CURRENT_USER/Software/Yahoo/Pager/Test
  • Here in right side panel, right click to create a new Dword value with name Plural and give it value 1.
  • Now close the registry editor and restart your computer after any changes to go into effect.
  • For signing in with new YAHOO ID open another messenger open as many messengers you need.
  • If you want to disable the multiple messenger option then again open registry editor and change Plural value 1 to 0.
  •    
    IF YOU LIKE MY WORK PLEASE DO COMMENTS OR SUBSCRIBE

View previously open Folders after Shutdown or Logoff


In this trick you will be able to view previously open folders after shutdown or logoff your pc.If you need to access lot of folders on your home computer or on the network regularly then you can set them re-open automatically, when you will login, shutdown or restart your computer next time. There is no need to open regularly used folders manually, just configure the simple sitting, your computer will automatically reload all the previously opened windows.
By default windows XP disables this option to reload automatically all the previously opened windows, when you login on, shutdown or restart your computer.
Follow the given steps to configure your computer to reload previously opened folders automatically after shutdown. 
  • To edit this feature, you will need to be logged into your computer with administrative rights.
  • First click on Start button then go to Control Panel. 
  • Open the “Appearance and Themes” option in control panel then click on Folder Options. 
  • A small windows dialog box will appear with the title “Folder options”, click on View tab.
  • Under the Advanced setting section, scroll down to bottom and click the “Restore previous folder windows at logon option and then click Ok button to save sitting.
  • Now when you log off, restart or shutdown, your computer will automatically open the previously opened folders from the same location as before.
    if you like this please comment and subscribe my blog 

How to disable search history display in Windows 7?


In this trick i will show u how to disable search history display in Windows 7.Windows 7 automatically saves all the recent searches done by the users. Some people are annoyed by this feature as the last three searches become visible under the search box as you start typing in it. If the computer is shared by others, you might not want others to see your past searches. There is a way in which you can disable search history display in Windows 7. However, you cannot disable search history display in Windows 7 Home editions. This is due to the fact that you need to utilize the Group Policy Editor for achieving this goal and it is not available in the Home versions. Follow these steps to disable search history display in Windows 7:
Enter gpedit.msc in the search box of the Start menu. Press Enter. This will open the Local Group Policy Editor.
Scroll down to User Configuration \ Administrative Templates \ Windows Components \ Windows Explorer.
Double-click on Turn off display of recent search entries in the Windows Explorer search box on the right hand side of the dialog box.
Select Enabled and click on the Apply button.
Click on the OK button.
Close out of the Group Policy Editor.
From now on, you won't be bothered by the display of recent search history as you start typing into the search box. 
if you like my work comment and subscribe 

How to Burn a Data CD or Data DVD in Windows 7 Using Media Player?


In this trick you will be able to burn data cd or data dvd with windows media player.You can burn a data CD or data DVD in Windows 7 using Media Player. An audio CD can contain just approximately eight minutes of music. On the other hand, if you burn a data CD or data DVD in Windows 7 using Media Player, it will be able to hold numerous hours of music. Video files and pictures can also be added to the data discs.

Advantages
 When you burn a data CD or data DVD in Windows 7, the Windows Media Player does not transform the selected files to a different format prior to saving them to a blank data disc, so the files stay in the compressed condition. This allows you to put much more items on a single disc.
 As the format of the files is not changed, the quality of the files remains the same. 
You can burn a data CD or data DVD in Windows 7 using Media Player as follows:
  •  Click Start.
  •  Click All Programs.
  •  Select Windows Media Player.
  •  Click the Burn tab in the Player Library.
  • Click Burn options and select Data DVD or CD.
  •  Insert a blank disc into the CD or DVD burner of your computer.
  • Close the AutoPlay dialog box if it comes into sight.
  •  Some people have more than one CD drive in their computer. If you have multiple CD drives in your computer too, select the one you would like to use in the navigation window.
  •  Look for the songs you want to burn.
  •  In order to make your burn list, drag the songs from the details pane in the center of the Player Library to the list pane which is on its right side.
  •  You can also change the order of the items in the burn list by dragging them upward or downward in the list. 
  •  To remove a song from your list, simply right-click on the item and click on Remove from list.
  •  After you finish making your list, click upon Start burn.
It can take a while to burn a data disc. If your selected items cannot fit in one disc, you also have the choice of burning the rest of the items to a different disc. A data DVD is not the same as a DVD-Video disc e.g. the movie DVD you buy or rent from the store.
If you like my post please comments and subscribe my blog

Fast and Easy Acces to Google

It is more a geek tool but if you are familar with command line more, then Google command line tool may able to speed your search up. On top of normal search command, it also has some shortcuts for using Google services like translation, PDF search, specific OS searches etc.
  • /translate languages:language url – Translates text or an url using Google’s translate service. If you wish to translate an url, it must start with http://, otherwise it will be considered text.
  • /pdf string – Searches for documents in Adobe Portable Document Format (old Acrobat) .pdf
  • /linux string – Searches for pages related to the penguin.
  • /mac string – Searches for pages related to Apple©, Mac OS© and other Apple products and sites.
Here is the introduction from them:
Google Command Line is a command-line based interface to Google’s services. With it you have fast and easy access to many Google services, such as the default search, the image search, the maps, the language tools, etc. All in the best geek way.
Full command list are at the following link:
Google command line – [felipc.com projects]